> ## Documentation Index
> Fetch the complete documentation index at: https://print.app/docs/llms.txt
> Use this file to discover all available pages before exploring further.
# Soft Color Proofing
> Color proofing lets your customers preview their design colors as they will appear in print before they place an order.
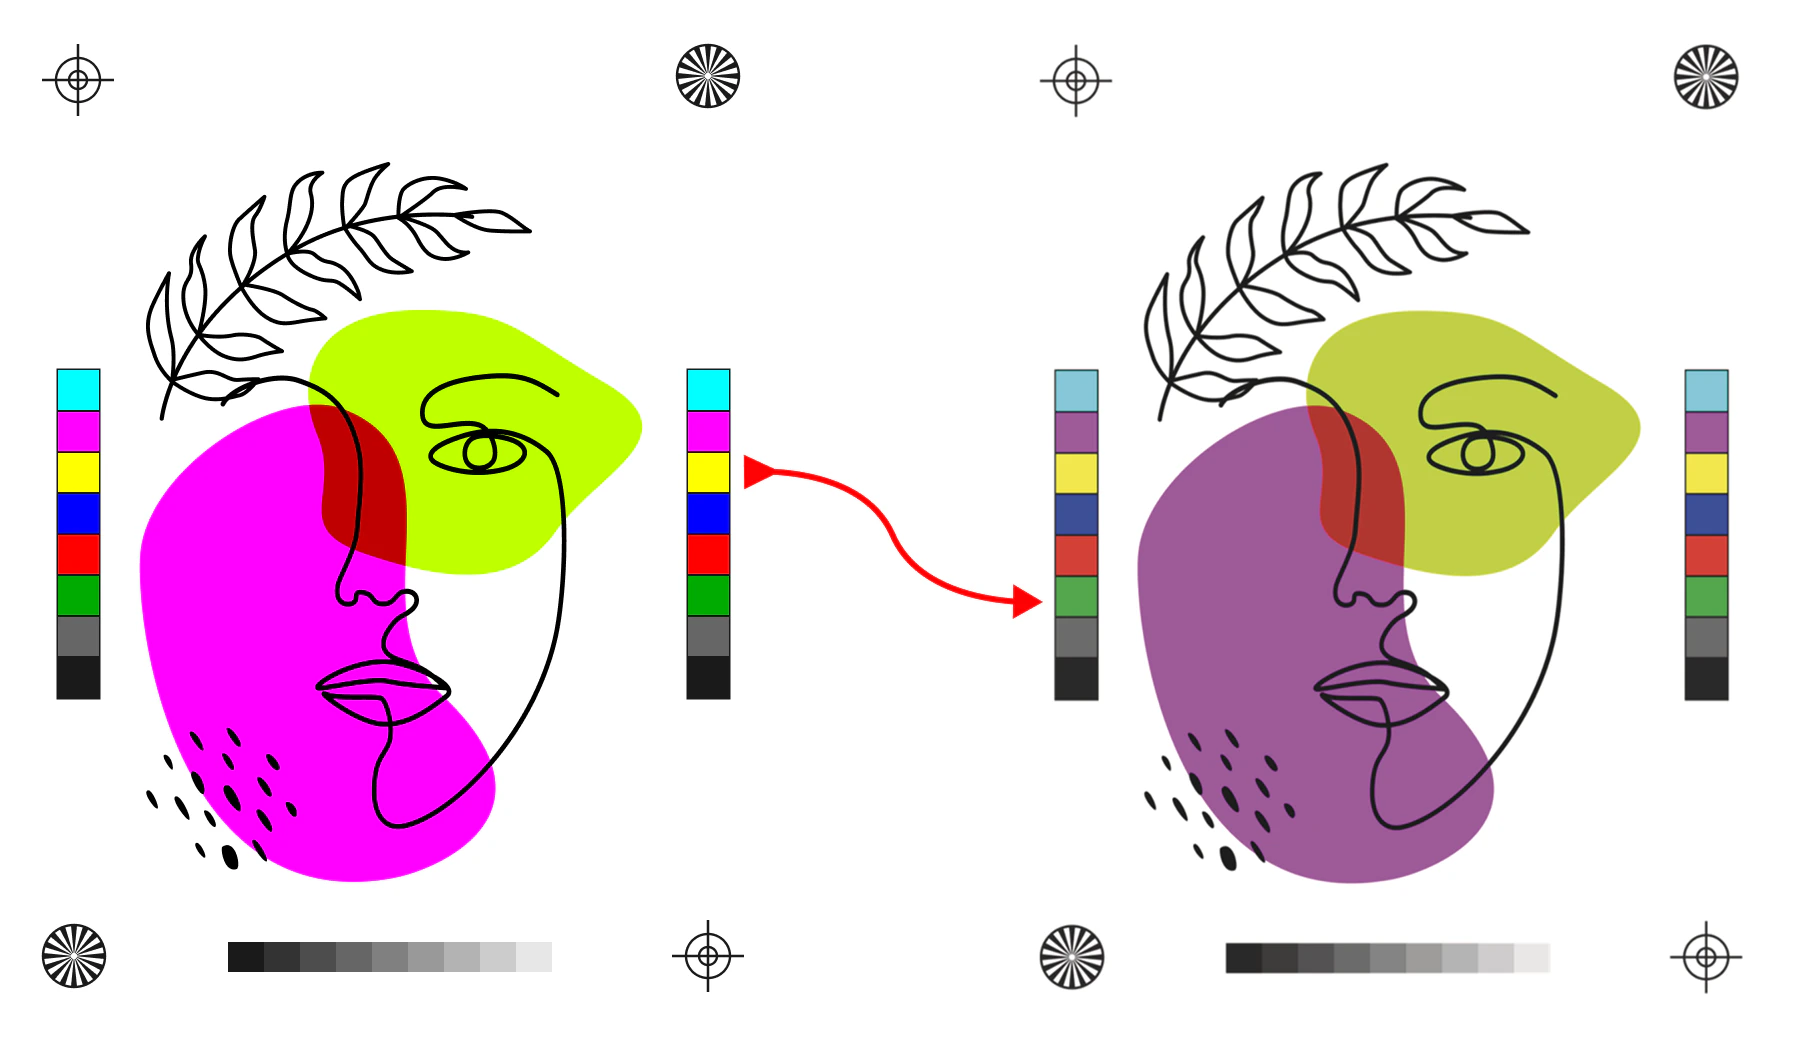
Color proofing is a powerful feature in Print.App that allows your customers to see a preview of how their design colors will look when printed. This is especially important for ensuring that the colors in the design match the expected output, as colors can sometimes appear differently on screen compared to print.
It's similar to Photoshop's soft proofing feature, where you can simulate how colors will look on different devices or under different lighting conditions.
This helps to set accurate expectations for your customers and reduce the likelihood of returns or dissatisfaction due to color discrepancies.
 ### How to enable color proofing
To get started, create a new Design in your [Admin Designs page](https://admin.print.app/designs) or go to any of your existing Designs.
Click the Design tab on the left panel and scroll down to where you see **PDF Rendering**. For Proofing to work, you need to assign an ICC Profile to your design. Pull down the Color Profile dropdown and select the ICC profile that matches your product's printing process. Ensure it's a CMYK profile, as you will not see any difference if an RGB profile is selected, being the same profile as your screen.
### How to enable color proofing
To get started, create a new Design in your [Admin Designs page](https://admin.print.app/designs) or go to any of your existing Designs.
Click the Design tab on the left panel and scroll down to where you see **PDF Rendering**. For Proofing to work, you need to assign an ICC Profile to your design. Pull down the Color Profile dropdown and select the ICC profile that matches your product's printing process. Ensure it's a CMYK profile, as you will not see any difference if an RGB profile is selected, being the same profile as your screen.
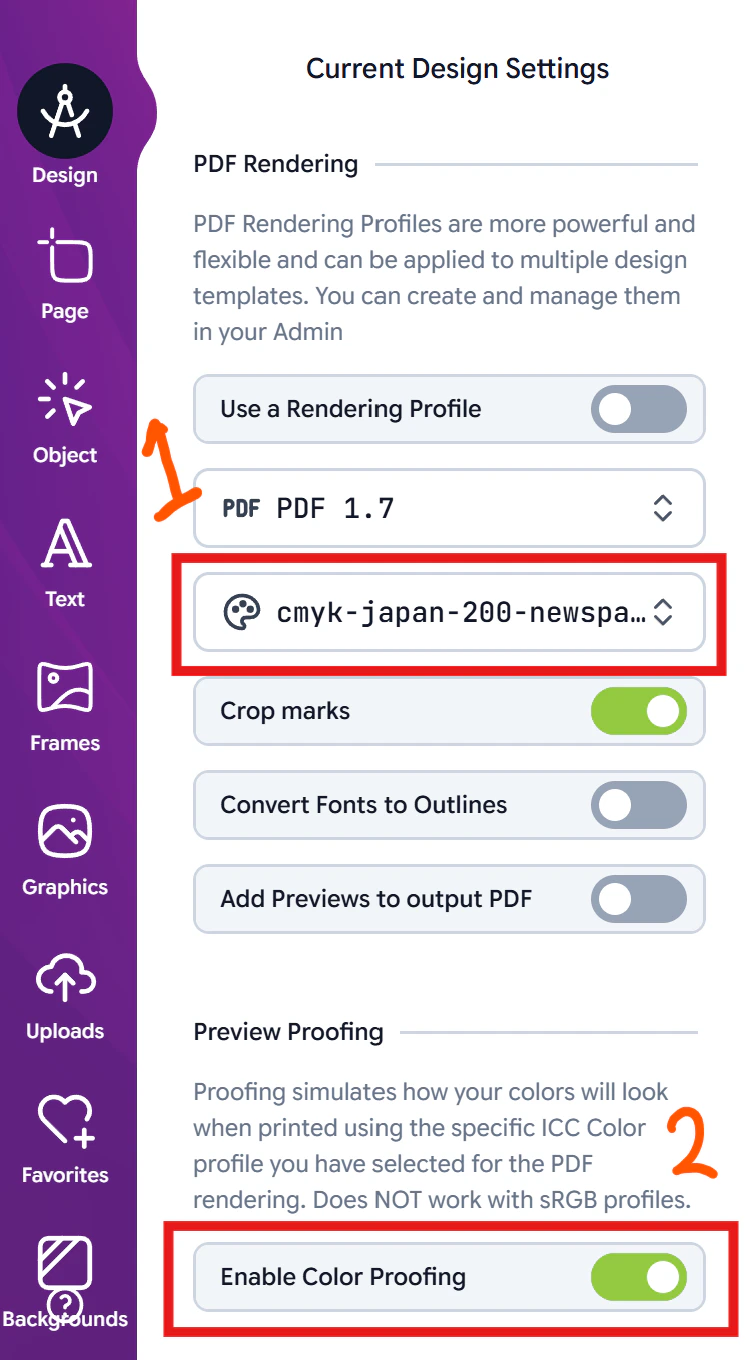 Once you select the ICC profile, scroll down and toggle ON the **"Enable Color Proofing"** switch.
You can see it applied in the preview mode. Simply click the Preview button on the top right of the editor and you will see the colors in the preview change to reflect the color proofing simulation based on the ICC profile you selected.
Save your Design and assign it to a product.
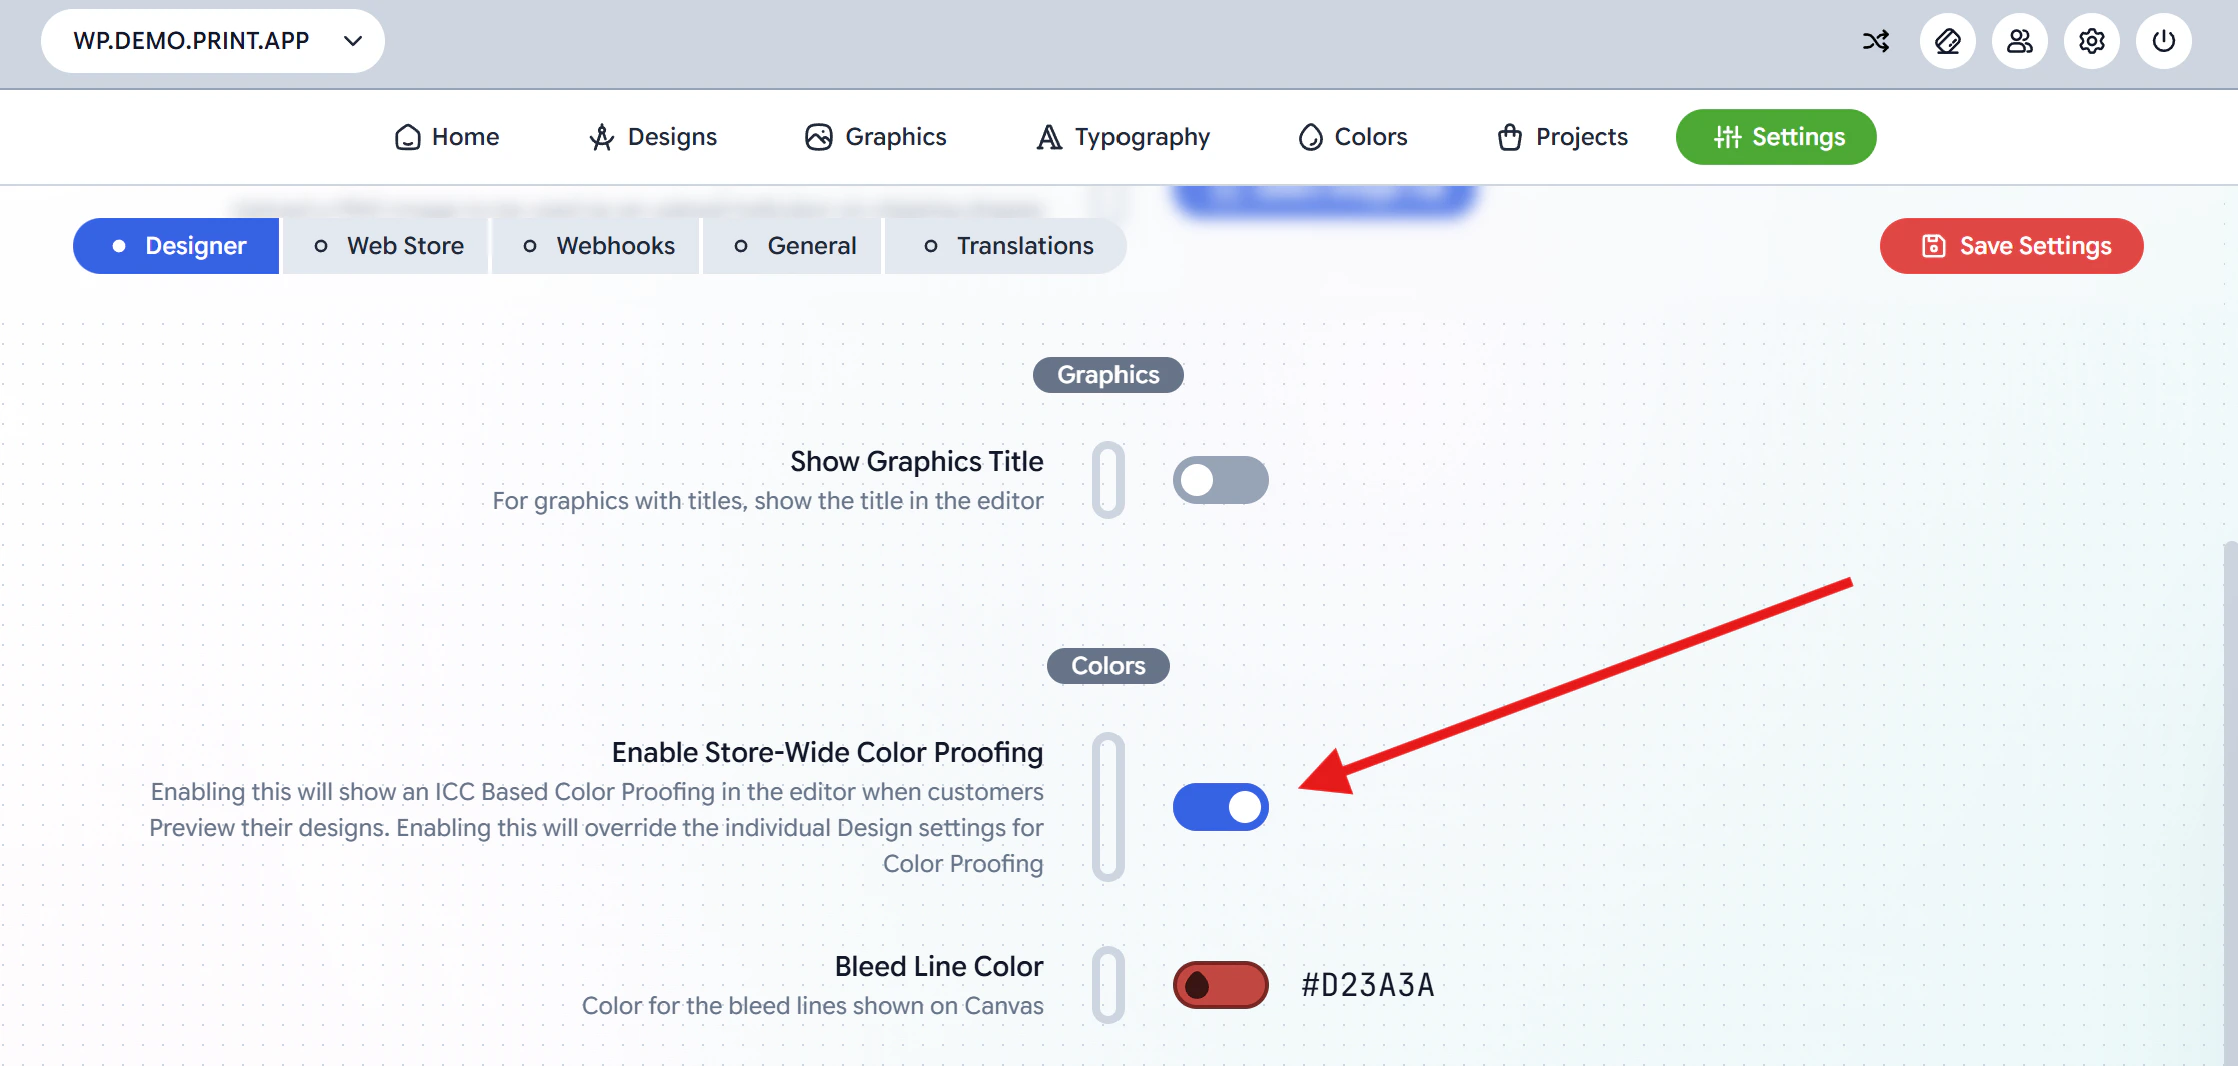
Optionally, you can also enable the Proofing across your entire store by enabling it in your [Admin Settings Page](https://admin.print.app/setting). This option will override the individual design settings.
Once you select the ICC profile, scroll down and toggle ON the **"Enable Color Proofing"** switch.
You can see it applied in the preview mode. Simply click the Preview button on the top right of the editor and you will see the colors in the preview change to reflect the color proofing simulation based on the ICC profile you selected.
Save your Design and assign it to a product.
Optionally, you can also enable the Proofing across your entire store by enabling it in your [Admin Settings Page](https://admin.print.app/setting). This option will override the individual design settings.
 You can also apply ICC profiles to your PDF by using the **PDF Output Profiles** feature, which is more robust, and in addition, passes along a Rendering Intent for the proof simulation.
You can read more about it here: [PDF Output Profiles guide](/guides/projects/pdf-output-profiles).