> ## Documentation Index
> Fetch the complete documentation index at: https://print.app/docs/llms.txt
> Use this file to discover all available pages before exploring further.
# Smart Objects
> How to create a Smart form Object
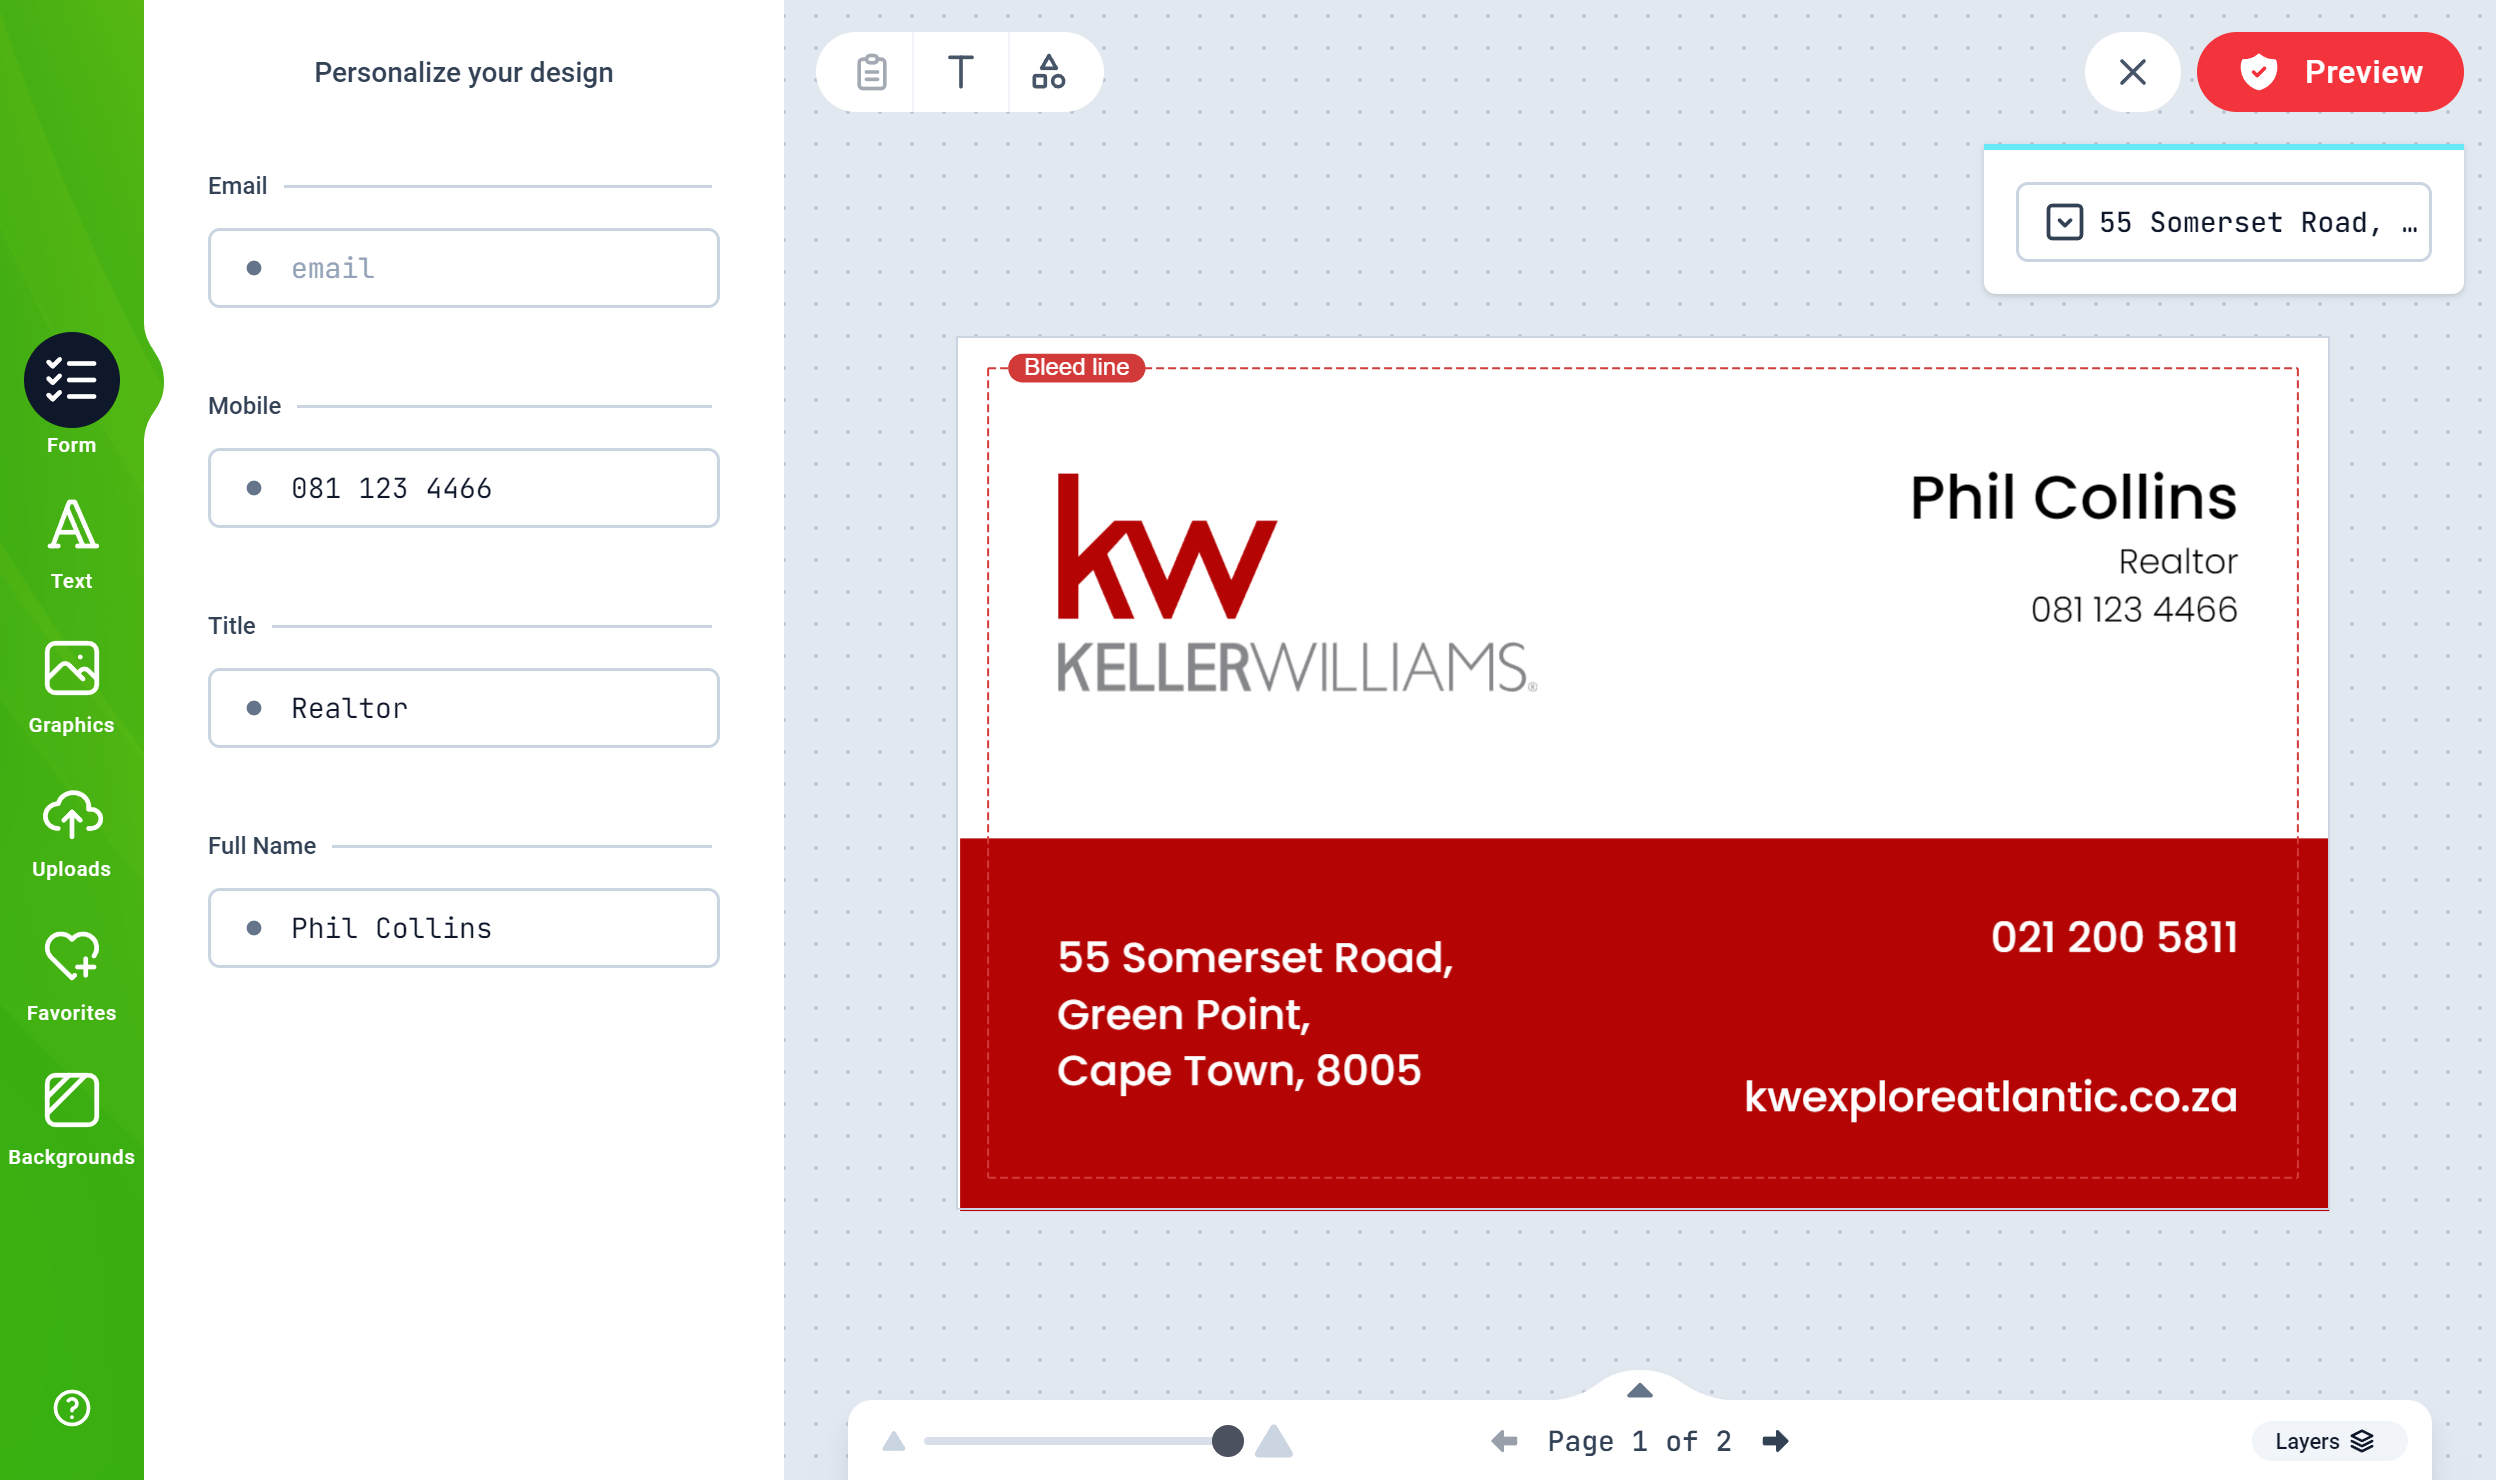
Smart Objects are items on the canvas whose value is dynamically linked to a Form or a Datasource.
Forms are automatically displayed in the Editor to your customers if you have one or more Smart Texts enabled.
### How to create a Smart Text
* Create a Text Object and edit the text value to what you want. eg `hello@company.com`
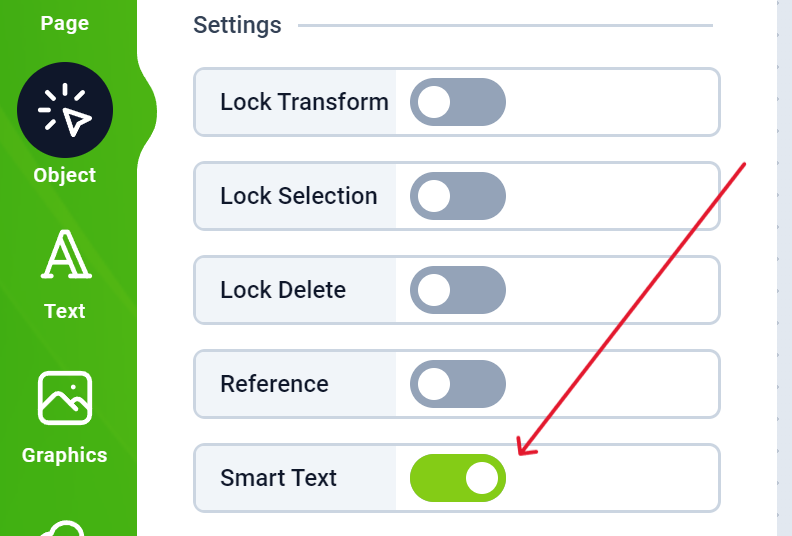
* Select the Text and go to the Object tabs. Enable the Smart Text switch.
Your Text has become a Smart Object and will appear in a Form on the left panel when your customers are editing the Design.
* To provide additional details, you can give the Text a title `Email`. You do this on the Object panel as well.
### Create a Smart Text using multiple variables
The simple Smart text you created earlier allowed you to create only one editable variable, which is an email.
Using curly braces `{variable}`, you can combine one or more variables into a single multi line Text field.
Think of an Address or user details. It has the a name, email, phone number with extension and address. These can be combined in a single text field but editable individually in the form.
```Text theme={null}
{Name:Jane Doe}
{Email}
{!*Phone:: 081444 2822} {*Ext:: 02}
{Address:Address line
Address Line 2,
City, Zip Code}
```
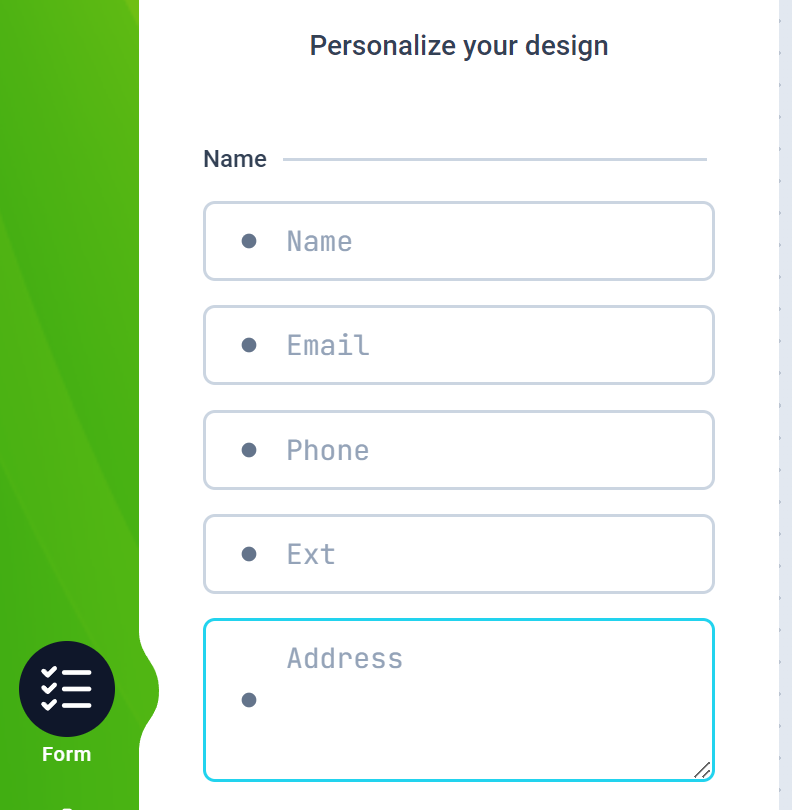
Consider the above as the full text you typed into a mutlti line textbox.
This is how it will appear in the form:
Let us dissect the values by following each sets of curly braces *(opening and closing)*.
* `{Name:Jane Doe}`: The first item before a colon `:` is teated as the title while the text that follows is treated as the default value. Here, the title is Name, and the default value is Jane Doe.
* `{Email}`: This is treated as the Title with no default text value.
* `{!*Phone:: 081444 2822} {*Ext:: 02}`:
* The `!` means that line is required and must be supplied by the customer.
* The `*` before a Title implies that though the `Phone` and `Ext` are titles, they should be included in the final text content, so they have dual use. A title, and as part of the final text on canvas.
* The double colon `::` implies that the first colon is a separator while the second one should be included in the final text value. So you have `Phone: 081444 2822 Ext: 02` as the final text; replacing the numbers with whatever your customer provides.
* The Address line spans 3 rows and should be treated as a single Title, Value pair. With this, a multi line textbox is provided for the user to type into. If they omit line 2 of the address, the text shifts up.
### Smart Text Summary
| | | |
| ----------------- | - | ------------------------------------------------------------------------------- |
| `{title}` | - | Opening and closing braces is used to create a smart text title |
| `{title:Default}` | - | A default text value can be provided with a separation colon after the title |
| `!` | - | Exclamation means this line is requried |
| `*` | - | Asteriks means the title following should be included in the final text as well |
| `::` | - | Double colon means a colon should be added to the final text |
 Your Text has become a Smart Object and will appear in a Form on the left panel when your customers are editing the Design.
* To provide additional details, you can give the Text a title `Email`. You do this on the Object panel as well.
### Create a Smart Text using multiple variables
The simple Smart text you created earlier allowed you to create only one editable variable, which is an email.
Using curly braces `{variable}`, you can combine one or more variables into a single multi line Text field.
Think of an Address or user details. It has the a name, email, phone number with extension and address. These can be combined in a single text field but editable individually in the form.
```Text theme={null}
{Name:Jane Doe}
{Email}
{!*Phone:: 081444 2822} {*Ext:: 02}
{Address:Address line
Address Line 2,
City, Zip Code}
```
Consider the above as the full text you typed into a mutlti line textbox.
Your Text has become a Smart Object and will appear in a Form on the left panel when your customers are editing the Design.
* To provide additional details, you can give the Text a title `Email`. You do this on the Object panel as well.
### Create a Smart Text using multiple variables
The simple Smart text you created earlier allowed you to create only one editable variable, which is an email.
Using curly braces `{variable}`, you can combine one or more variables into a single multi line Text field.
Think of an Address or user details. It has the a name, email, phone number with extension and address. These can be combined in a single text field but editable individually in the form.
```Text theme={null}
{Name:Jane Doe}
{Email}
{!*Phone:: 081444 2822} {*Ext:: 02}
{Address:Address line
Address Line 2,
City, Zip Code}
```
Consider the above as the full text you typed into a mutlti line textbox.
 Let us dissect the values by following each sets of curly braces *(opening and closing)*.
* `{Name:Jane Doe}`: The first item before a colon `:` is teated as the title while the text that follows is treated as the default value. Here, the title is Name, and the default value is Jane Doe.
* `{Email}`: This is treated as the Title with no default text value.
* `{!*Phone:: 081444 2822} {*Ext:: 02}`:
* The `!` means that line is required and must be supplied by the customer.
* The `*` before a Title implies that though the `Phone` and `Ext` are titles, they should be included in the final text content, so they have dual use. A title, and as part of the final text on canvas.
* The double colon `::` implies that the first colon is a separator while the second one should be included in the final text value. So you have `Phone: 081444 2822 Ext: 02` as the final text; replacing the numbers with whatever your customer provides.
* The Address line spans 3 rows and should be treated as a single Title, Value pair. With this, a multi line textbox is provided for the user to type into. If they omit line 2 of the address, the text shifts up.
### Smart Text Summary
| | | |
| ----------------- | - | ------------------------------------------------------------------------------- |
| `{title}` | - | Opening and closing braces is used to create a smart text title |
| `{title:Default}` | - | A default text value can be provided with a separation colon after the title |
| `!` | - | Exclamation means this line is requried |
| `*` | - | Asteriks means the title following should be included in the final text as well |
| `::` | - | Double colon means a colon should be added to the final text |
Let us dissect the values by following each sets of curly braces *(opening and closing)*.
* `{Name:Jane Doe}`: The first item before a colon `:` is teated as the title while the text that follows is treated as the default value. Here, the title is Name, and the default value is Jane Doe.
* `{Email}`: This is treated as the Title with no default text value.
* `{!*Phone:: 081444 2822} {*Ext:: 02}`:
* The `!` means that line is required and must be supplied by the customer.
* The `*` before a Title implies that though the `Phone` and `Ext` are titles, they should be included in the final text content, so they have dual use. A title, and as part of the final text on canvas.
* The double colon `::` implies that the first colon is a separator while the second one should be included in the final text value. So you have `Phone: 081444 2822 Ext: 02` as the final text; replacing the numbers with whatever your customer provides.
* The Address line spans 3 rows and should be treated as a single Title, Value pair. With this, a multi line textbox is provided for the user to type into. If they omit line 2 of the address, the text shifts up.
### Smart Text Summary
| | | |
| ----------------- | - | ------------------------------------------------------------------------------- |
| `{title}` | - | Opening and closing braces is used to create a smart text title |
| `{title:Default}` | - | A default text value can be provided with a separation colon after the title |
| `!` | - | Exclamation means this line is requried |
| `*` | - | Asteriks means the title following should be included in the final text as well |
| `::` | - | Double colon means a colon should be added to the final text |